3D Printing Files

3D Printing Files

The two most common printer files you will encounter are .STL and .Gcode files.  Understanding these will remove some of the confusion when 3D printing for the first time.

STL Files

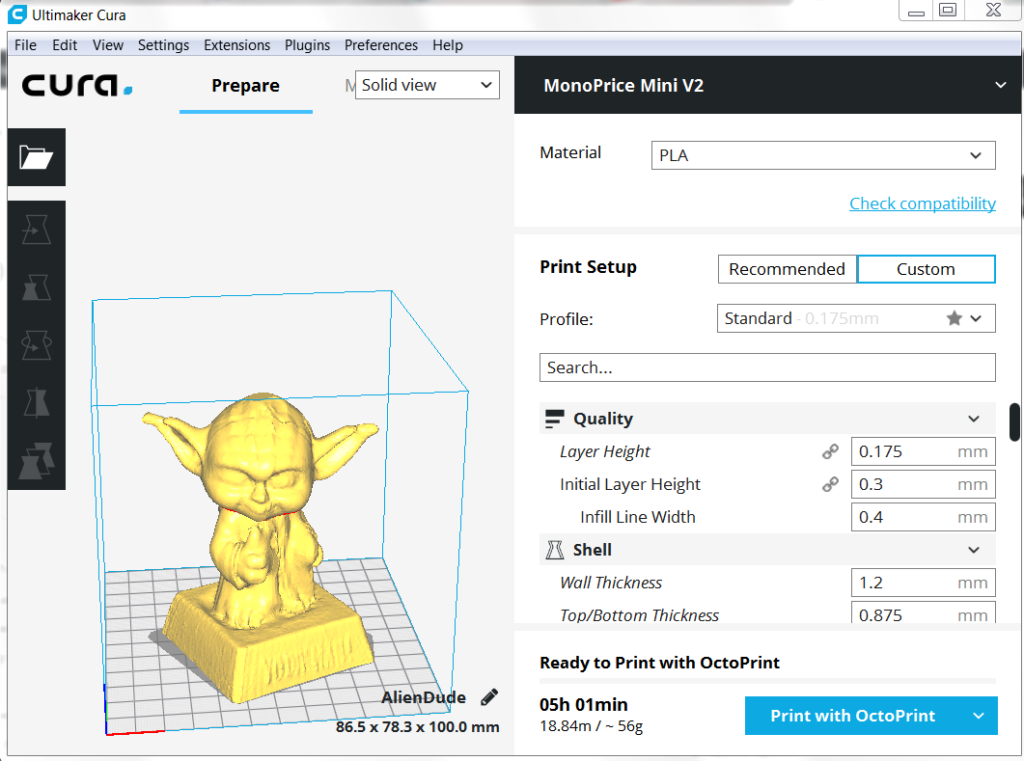
The first file we will cover are .STL files.  This file format is supported by many different modeling programs that are used for creating 3D shapes of objects.  The files are created using CAD (Computer aided design) like AutoDesk, Fusion360, TinkerCad and many more.  The data  stored in these files do not take into account what type of filament color or types you are using.  It is not possible to print .STL files directly because your printer does not know what you want to do with the model.  You will need to “Slice” this model into .Gcode so your printer can understand it.

Gcode Files

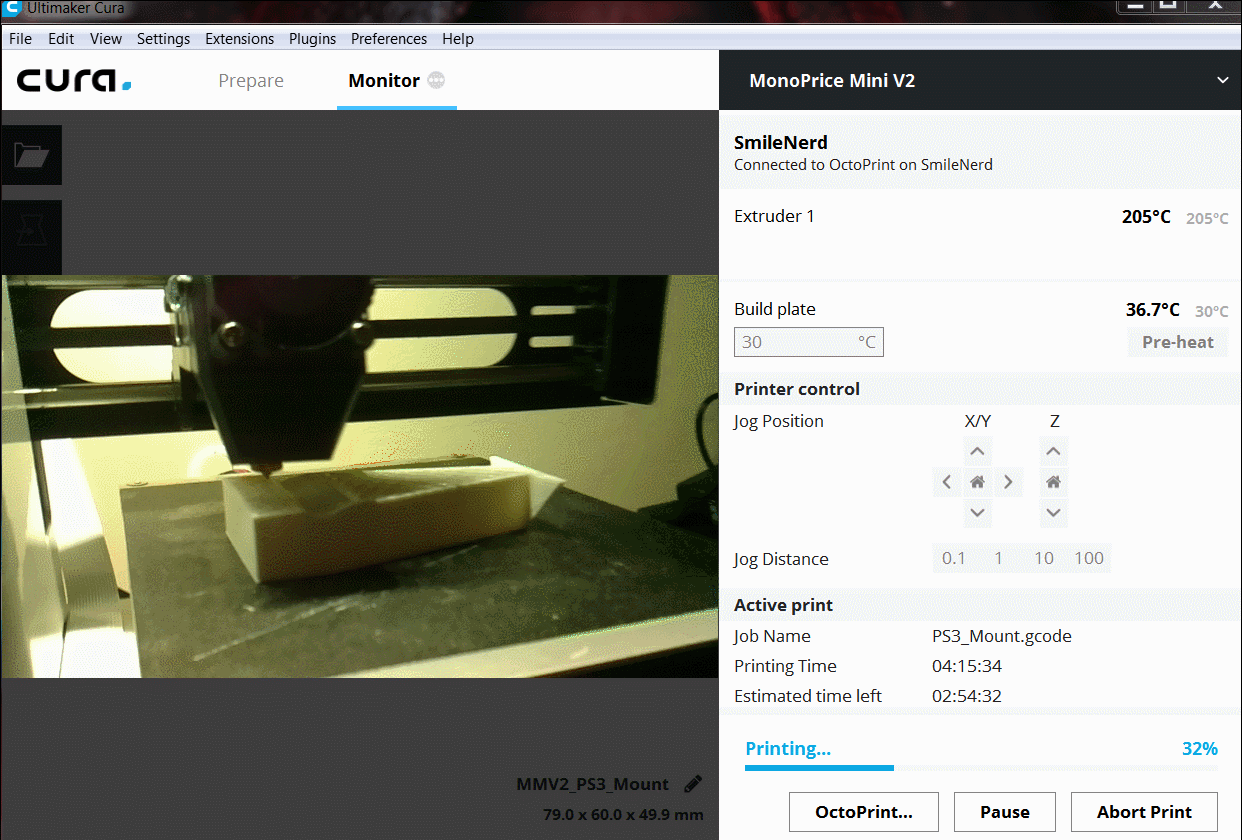
You’re probably asking yourself, “How do I slice and why do I need to do this”?  Creating or finding the part is only half of the equation when 3D printing.  You need “Slicing” software, like Cura, to create the instructions your printer needs to build the model on the 3D printing build plate.  The code is a jumble of letters and numbers that the printer uses to understand how fast to move, when to retract, how much plastic to feed and at the exact X/Y/Z coordinates.  Gcode is also used when operating CNC Machines (Computer numerical control) becuase it defines how fast and at the exact X/Y/Z coordinates the tool should cut.

Basically, to create the Gcode you will need to load your .STL files into a slicing software to tell the printer how to print.

Octopi – Send Prints From Cura

Cura allows users to send and monitor prints directly from the slicer.  Adding this new option send the prints to Octopi, starts the print and will show a preview window with of a webcam.  There is another option to store the G-code directly to the SD card on the printer but it is not recommended.

Instructions:

Verify Octoprint plugin is installed

With Cura open, click on Plugins and Browse Plugins..

In the preferences window, verify that OctoPrint Connection is checked.

If the option for Octoprint Connection is unavailable , select Plugins and Browse Plugins.. from the main menu.  Download the OctoPrint Connection plugin.

Configuring Cura for Octoprint

With Cura open, click on Preferences and Configure Cura..


Click on Printers in the left menu.  Click on Connect OctoPrint.

The default setting connects to octopi.local/I have found this to be unreliable so I created a new setting that points to the static local IP of my Raspberry PI (Octopi).   To do this click the Add button.


Type an instance name.  You can use any name you want.  This would be useful if you have more than one Raspberry Pi setup.

Type in the IP address for you Raspberry Pi running Octopi.  The default port number is 80.  Click on the Ok button.


You will need the API Key from Octopi to complete the connection to Cura.  Navigate to the home page on your Octopi Setup.  (octopi.local/).

Click on the wrench on the menu bar of the webpage to open OctoPrint settings.

In the left menu, click on API.

The API Key will be in the field to the right.  Copy the text for the API key.


Navigate back to Cura.  You will need to enter the API Key in the field below.  You have the option to check Automatically start print job after uploading, Show webcam image and Store G-code on the printer SD card. 

I checked all except the option to save the G-Code to the printer SD card.

Click Close.

There will now be an option to Print with Octoprint in Cura.

The monitor tab can be used to control the printer, view printer stats and webcam.