Alexa, Flush The Toilet

As the title suggests, I’ve rolled up my sleeves and created a way to flush a toilet and integrate that into my home automation system.  The commands work with my Amazon Alexa for ease of use using some custom Arduino code. I also have an Echo Dot mounted in my bathroom.

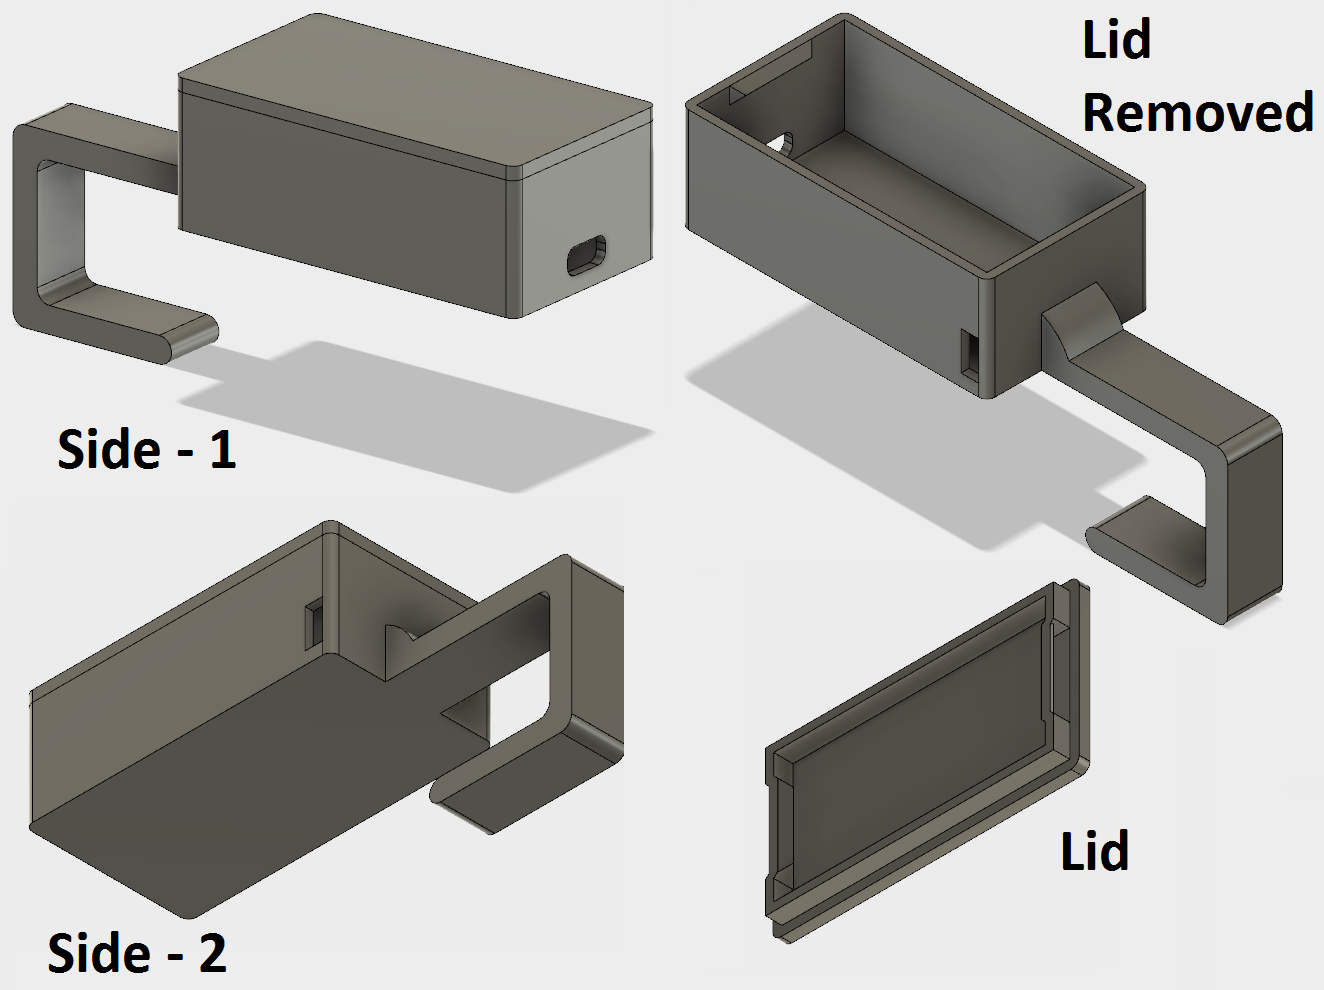
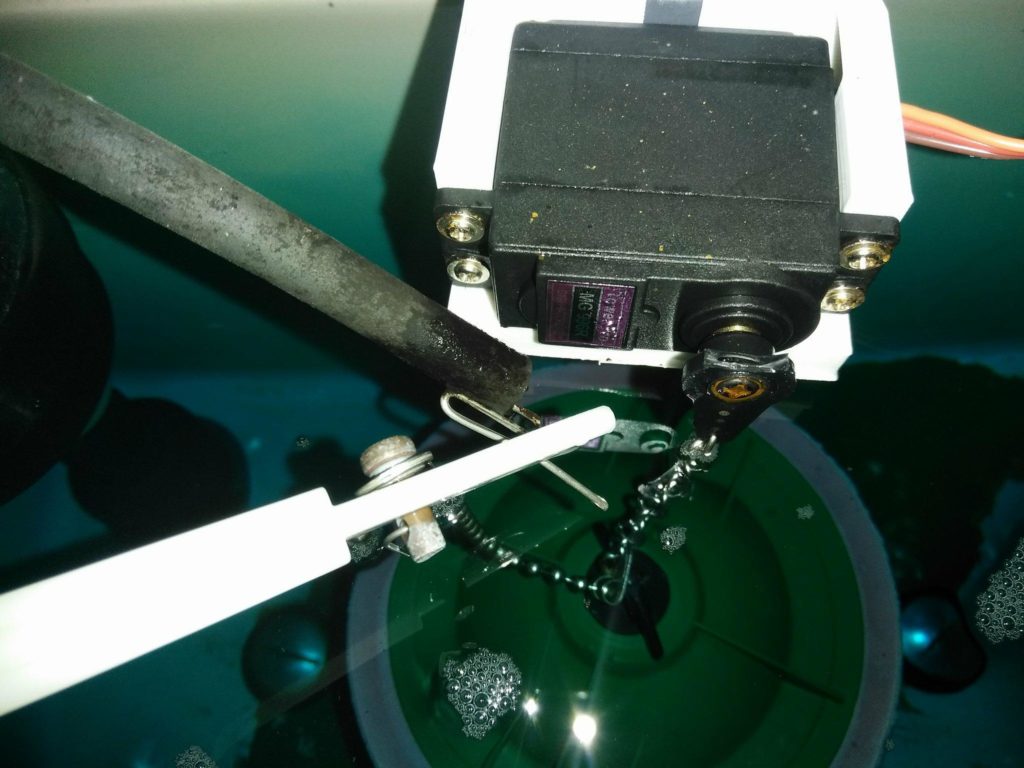
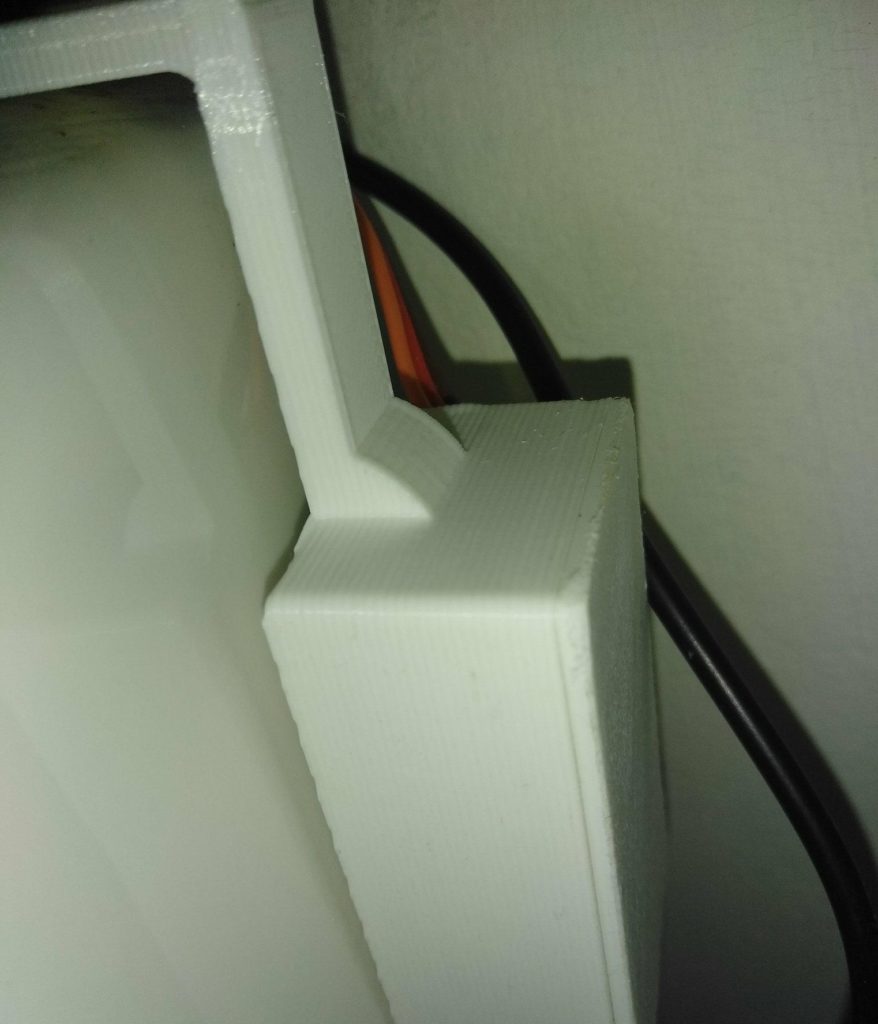
The original handle on the toilet works as normal.  The servo is mounted in a custom 3D printed case that fits above the flapper and around the overflow valve.  The servo wires are connected to the NodeMCU that is in a custom 3D printed case that hangs on the side of the toilet.  The whole system is powered through a single cable either using a power bank or standard usb-b phone charger.

Device In Action

Component List

-Access to 3D printer
-NodeMCU
-MG996R Digital Torque Metal Gear Servo
-Chain for servo to flapper
-Power (battery bank or phone charger)
-Usb-b cable

3D Printed Parts

Available on Thingiverse – Download Here 

Alexa Echo Dot Servo Arduino NodeMCU Smartthings Home Automation 3d printing
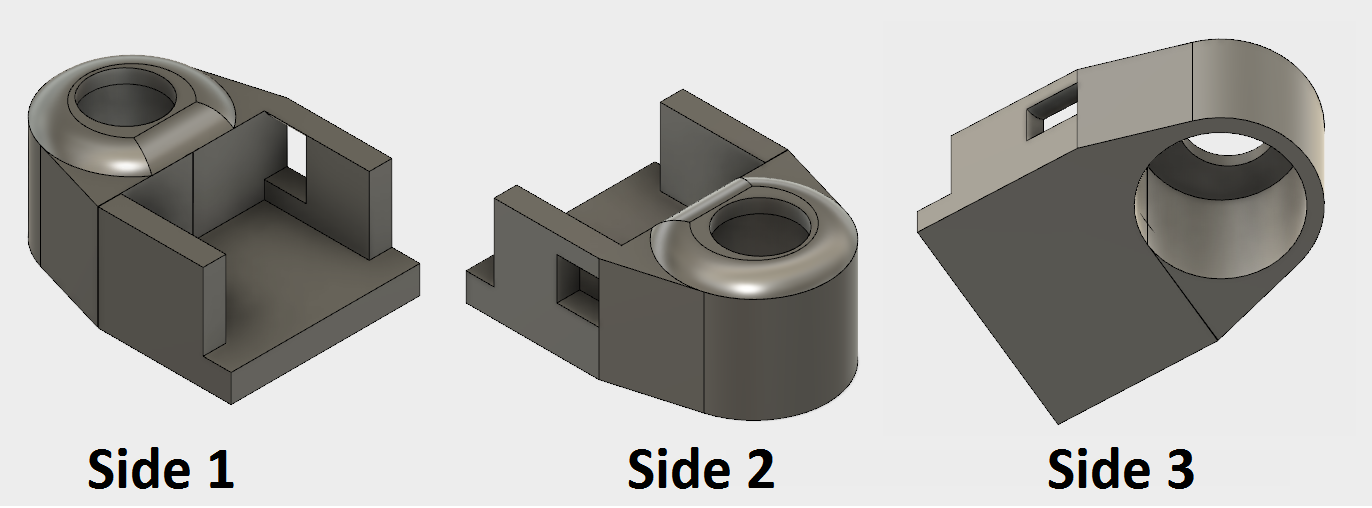
Servo Overflow Mount

Alexa Echo Dot Servo Arduino NodeMCU Smartthings Home Automation 3d printing case
NodeMCU Toilet Side Mount


Installation

Connect the red wire to the 3.3v connector on the NodeMCU.  Connect the black/brown wire to GROUND.   The yellow/orange cable should be connected to D1 on the NodeMCU.

I installed the servo motor to the mount that goes on the overflow valve with two screws on each side.  The chain is mounted from the last hole on the servo arm to the flapper. There should be a little play in the flapper chain. Wash your hands!!!! It is a toilet. 

The original handle can be left installed.  You could also replace the normal flush handle with an electric push button.

Toilet Alexa Echo Dot Servo Arduino NodeMCU Smartthings Home Automation 3d printing case
Toilet Overflow Servo Mounted


NodeMCU Mount Toilet Alexa Echo Dot Servo Arduino NodeMCU Smartthings Home Automation 3d printing case
NodeMCU Mount Toilet Side Mount


Program NodeMCU

Below is the code that I am currently using for this project. The code is horrible and I am working on better code to replace it.  You can download this garbage and use it if you want.  It works but it is not up to my standard.  Feel free to email me or contribute in this section.

Download – Toilet Servo Trash


Choosing A Protocol

Zigbee/Zwave/X10/WiFi

These protocols have their place in our current market and you will need to make a decision as to which will work best for you.

X10

This protocol is dead.  Throw your X10 devices in the trash and move on.  This may be harsh to some but I will explain.  The X10 protocol accepts more interference than most and does not mesh well in the world of newer home automation.  It is unreliable in our time.  It had it’s place “back in the day”.  It’s time has lapsed.  Unless you want to deal with loss of communication, stay away. Rant over. Don’t waste your time or your money.

Zigbee

This protocol uses a “mesh” network.  This means that the range of your devices will increase as you add more devices.  Zigbee uses 128-AES encryption which is sufficient for most home automation uses.  The power consumption on these devices are are low, allowing them to work for years on end before needing battery replacements.  Zigbee has an operating range of 35ft with a max number of 65,000 devices.

Zwave

Zwave also uses a “mesh” network so the reliability will increase with the number of devices used.  This protocol also uses 128-AES encryption making it very similar to the Zigbee protocol.  Zwave has an operating range of 100ft with a max number of 232 devices.

WiFi

There will be tons of controversy here. Technically speaking, WiFi enabled devices should flourish in this category.  It should dominate in both range and number of devices.  What you will find instead is a flurry of proprietary applications for very specific devices.  What this means is that even though you purchased a WiFi enabled device you will still have limitations (Phillips Hue, Belkin, Wemo and many knock-off brands).  Devices that use this protocol can often find a way to communicate but at a cost of reliability.  I will explain this more when discussing which hub to choose.

Summary

I use Zwave, Zigbee and WiFi protocols in that order.  I’ve found that the best manufactures to date use Zwave instead of Zigbee.  I do have some Zigbee devices but only if they work with my current Zwave ecosystem.  The only WiFi enabled devices I have are ones that I’ve created myself or purchased at a very low price due to compatibility problems that I will discuss further.

Introduction To Home Automation

The phrase “smart house” is subjective.  Unless you live in a cabin in the woods, we all use some form of home automation these days.  Home automation is what YOU make of it.   For example, things can be smart even if they cannot be controlled by your phone while you’re away on vacation.  I consider anything that makes day-to-day tasks easier a part of home automation. The first air conditioner was created in 1902.  I imagine that would be a pretty smart device for that time period.

You didn’t come here for me to ramble about what the definition of a “smart home” is.  I do want to open your mind as to what you should consider smart. To get the best results, you need to understand the technologies that exist and how to implement them.

With all of that out of the way, let’s talk about control and how you will interact in a narrow view of home automation.  Specifically, let’s look at some of the popular inputs and outputs that we have access to.

Here are a few inputs:

  • Fixed Settings (Timers/Temperature settings)
  • Touch
  • Sensors (temperature, water, open/close, motion, GPS)
  • Voice
  • Radio/Infared
  • The internet
  • IFTTT (If this then that) – One action causing another action.

Here are some outputs:

  • Light control
  • Thermostat
  • Displays (Cell phone/ Tv / Computer Monitor)
  • Doors (open/close/locking)
  • Sound/Music
  • The internet (goes back to displays or used for logging)
  • Anything that uses electricity (yes, all of them).

When I first created this list I thought, “wow, that is it?”.  Unfortunately, the list doesn’t get much longer.  We are still in the infancy of home automation.  In the future, computers will anticipate movement or changes and do things for us.  Until then, we need to provide some type of input.  Our outputs are currently limited by our inputs.

You can connect the dots using different protocols.  Take the output of lights for example.  I have lights that are controlled by timers, buttons/switches, open/close sensors, motion sensors, voice and through inputs of other programs and actions.

Below are some of the protocols, or different methods for inputs to communicate with outputs.

  • The internet/Wi-Fi
  • RF (radio frequency; proprietary radio frequencies)
  • IR (infrared)
  • Zigbee (technically radio)
  • Zwave (technically radio)
  • X10 (technically radio)

The goal of the home automation section is to help you with connecting the dots for what you need and the outputs you want to control.  Simplify what you need and conquer.